

The classic circle skirt is a great starter project for a sewer’s first venture into patternless sewing. It has only 2 seams, or maybe three, if you choose a fabric that requires hemming.
Ready for this one? It’s a breeze. Start with fabric wide enough to equal 2 times the length of your skirt, plus the diameter of your waist. You may ask “how do I get the diameter of my waist? Simple: Your high school geometry has the answer. Circumference divided by pi equals the diameter. Translate that to layman’s terms and that simply means that your waist measurement divided by 3. No biggie, right? Yes, pie is really more like 3.14, but we don’t need to be that exact for this project! (for more on this subject, take a look at “Essential Math for Sewers“) Or, you could just add the measurement across the front of your waist to the length you want it to be.
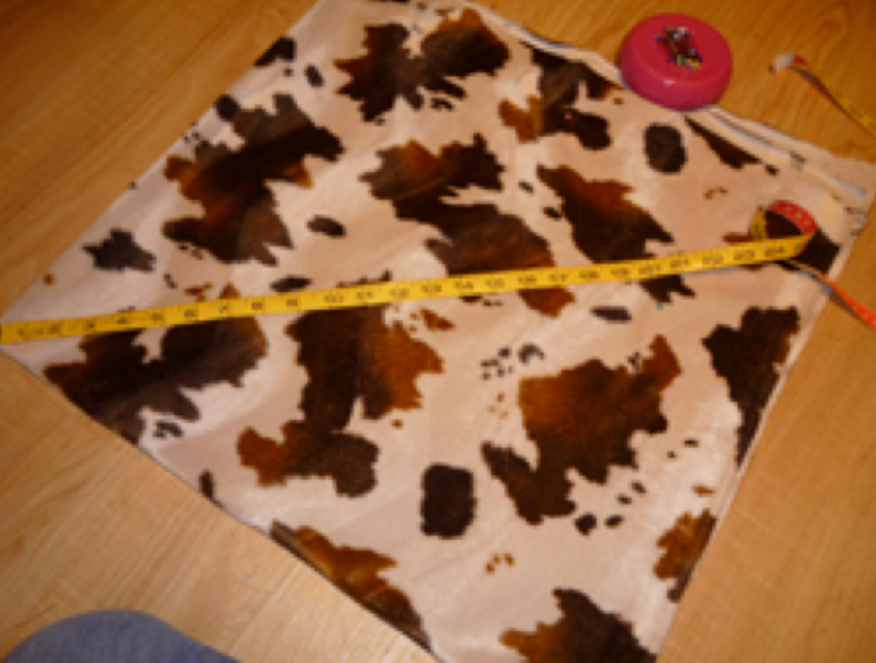
Quartered fabric. Measure from the folded corner
So, if you want your skirt to be 21 inches long, and your waist is 22 inches, here’s your math: 22 divided by 3, to get 7.3. To keep things simple and give you some wiggle room, round that to 7.5. Now here’s your required fabric width: 21 + 21 + 7.5 = 49.5. Add an inch for a hem (if you need one) to make 50.5 inch wide fabric. That would mean you are probably looking for 60 inch fabric.
You will need as much fabric as the required width. In this case, you need a bit over 1.635 yards. Round up to 1.75 yards. As most good fabric stores sell in eighths, and you will need about a 4 inch strip for a waistband anyway.
Trim off the extra inches over your magic number, for the waistband, and then fold your fabric in quarters. Measure and mark from the folded end along both edges, the sum of the length of your skirt, plus the waist radius (half the diameter) plus one inch for the hem (if needed). Do the same a few times somewhere in the middle. Cut along the marks you made. Voila. Half way there

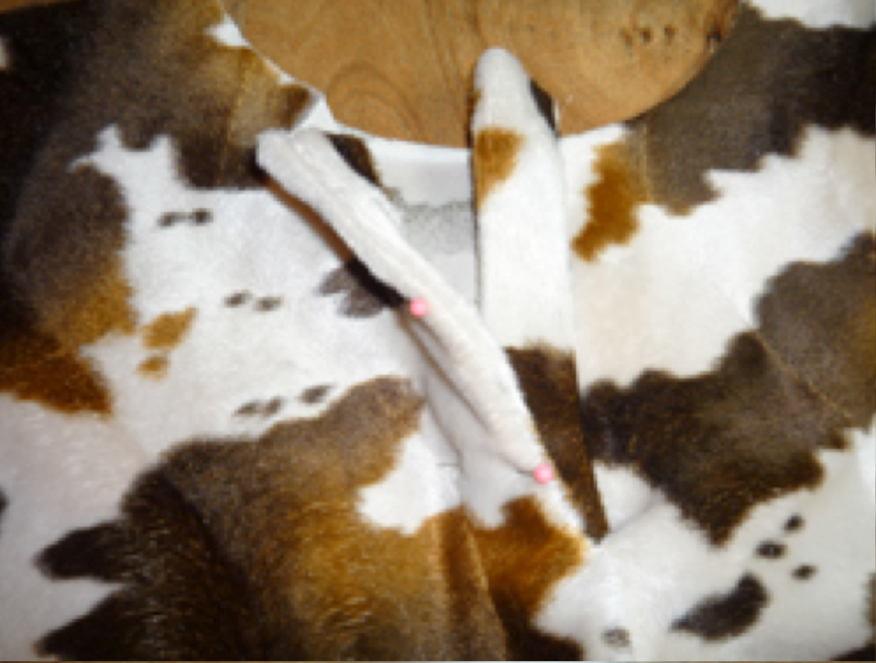
Waist cut, and placket slash being put in. Cut less than you think you need. You can always make it bigger, but you can’t make is smaller…unless you gather it up.
So now comes the waist. This is the trickiest part. Start with hayour rounded up diameter measurement less one inch. This will give you room for the waistband seam, and some final minor adjustments. Cut a 7 inch (or so) slit along one straight of the grain, starting from the waist opening. This is the center back, and will be your opening for a simple placket (which is all you will really need, especially if you are going to wear this with a crinoline). The straight of the grains will hang closer to the body. Set this way, center front, center back, and both sides will hang straight.

Placket pinned in place. Be careful at the bottom turn of the slash.
Make a placket with the scraps you cut away to make the body of the skirt. I make mine a bit wide, so there is plenty of coverage: About an inch and a half wide, finished. Cut a 14 x 3.25 inch strip, on grain. Fold—good sides out— and slip in some interfacing (another strip of your fashion fabric works great for woven fabrics), and apply it to the slit you made with a tiny 1/8 inch seam. You will need to treat the slit as one long edge. Finish the seam edge. Press. Fold one placket side back, and tack in place. This is the “top” of the placket you made.
Placket in place.
Slip the skirt on, and check the fit. With your seam allowance accounted for, will it fit? If it’s too small, remove a bit more fabric around the waist hole edge. Careful! Take only a little bit at a time here. It’s really easy to take too much. While it is hanging, perhaps on a dress form or a hanger, pull up on the area you are going to trim to see what it will do to the drape at that point. You can get a lot of different effects by playing with the waist seam. If you are bold, you can make a bunch of these and experiment with how taking from certain areas at the waist affects the drape of the skirt.
Apply the waistband as any other, with interfacing. Add a button. If you wish, you may add another button or two in the placket. Hem, if necessary. If you have used felt, you have no need for a hem. In circle skirts, it’s best to have a tiny hem, since the curve is great, and easing in is a problem. The easiest way to hem a circle skirt is to serge the circle and then turn the serged bit up and stitch. You could also use binding, or simply do a rolled hem.