

I have often knitted with fabric. You can knit with anything that you can make vaguely string-like. A favorite of mine are my silk “sweaters” made from my hand-dyed silk habotai. They are a weightless, breezy option for hot summer days. It’s also a great way to use up dye jobs that did not work out as you intended, or an ugly calico you somehow have 8 yards of. No matter how ugly it is as a flat fabric, it always looks great knitted up. The addition of the texture, and the camouflaging of a lot of the dye job flaws with that texture, seems to be magic.
So, how do you get it “string-like”? You tear it. Yes, that is all. You don’t even need to worry about raw edges. You need to use your educated guess to decide how wide to make your “string”, but I have found a half inch works for most applications. Start there and experiment to see what works for you and your project. It’s the size of your needles that will make the yarn work. Start with size 11 and work from there. Bonus effect: A fast knit-up!
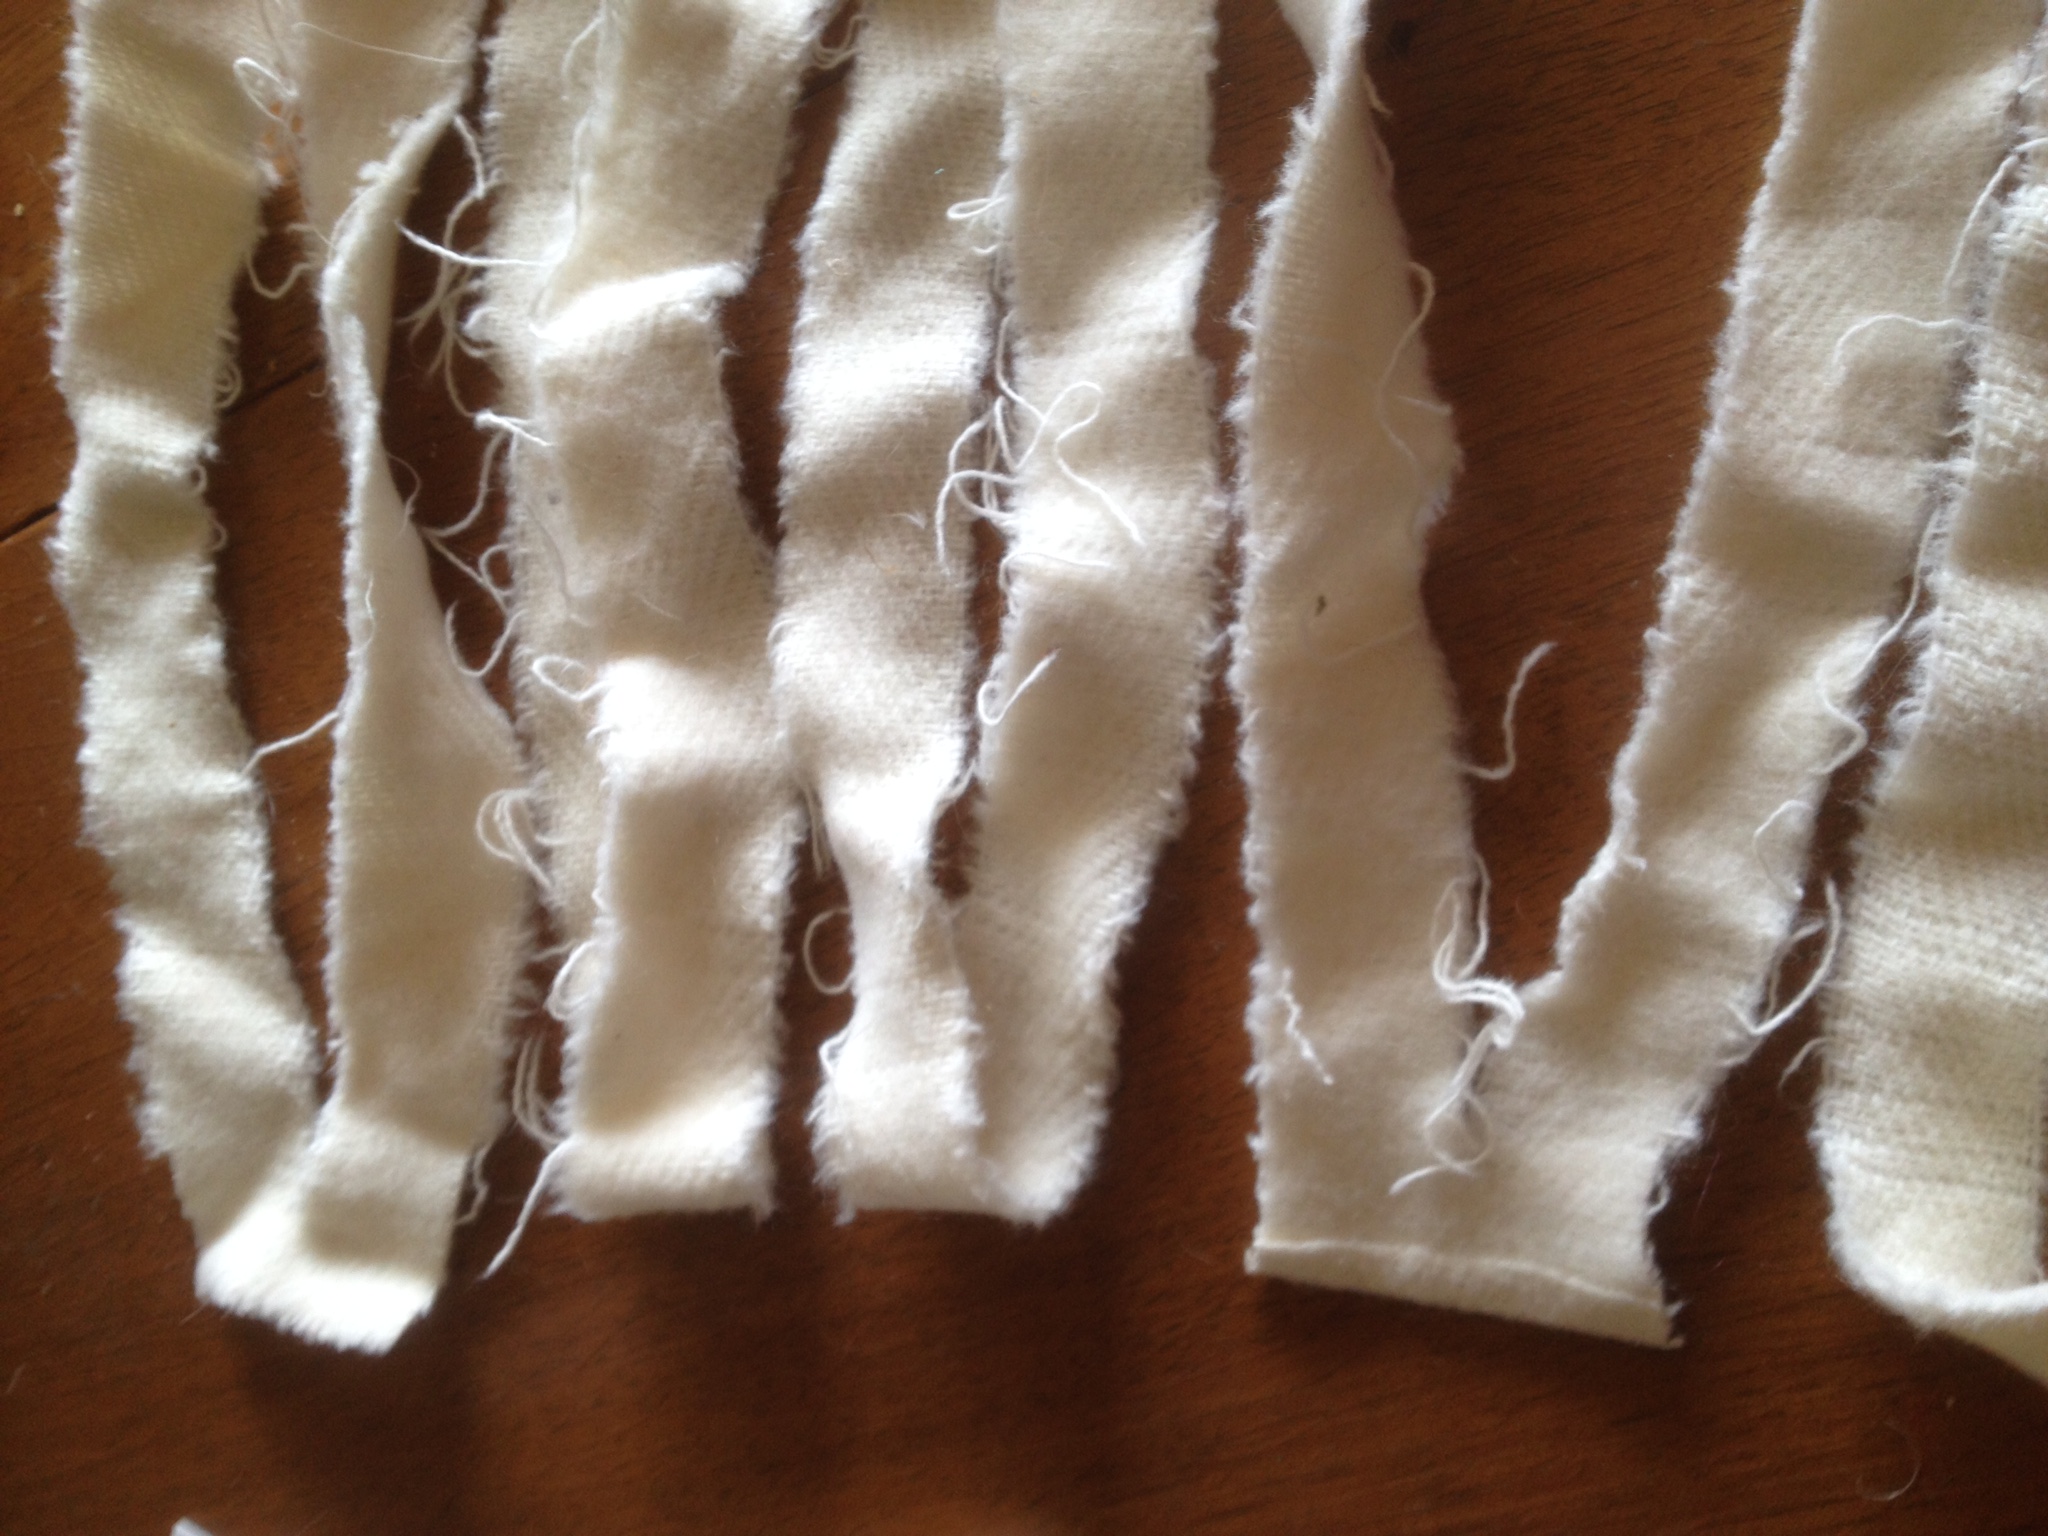
This is what it should look like as you tear.
To make your yarn out of fabric yardage, you must first be sure it is on grain, or you will lose the beginning and end of the “yarn”. The easiest way to do this is to tear off enough of the raw edges until your tear goes all the way across. Begin making your “yarn” yardage by snipping at the selvage a half inch down from the raw edge, tearing to about a half inch from the other selvage. Clip a half inch down from that tear, tearing that over, and so on, until all the fabric is processed. If the fabric is not inclined to tear, you can cut. It just takes longer.
Roll it into a ball as you go, to keep things neat. The turns at the selvage make really nice “slubs” in the finished work. Keep in mind that you will need a lot more fabric than you think. This jacket took about 3 yards of fabric to produce the required yarn.
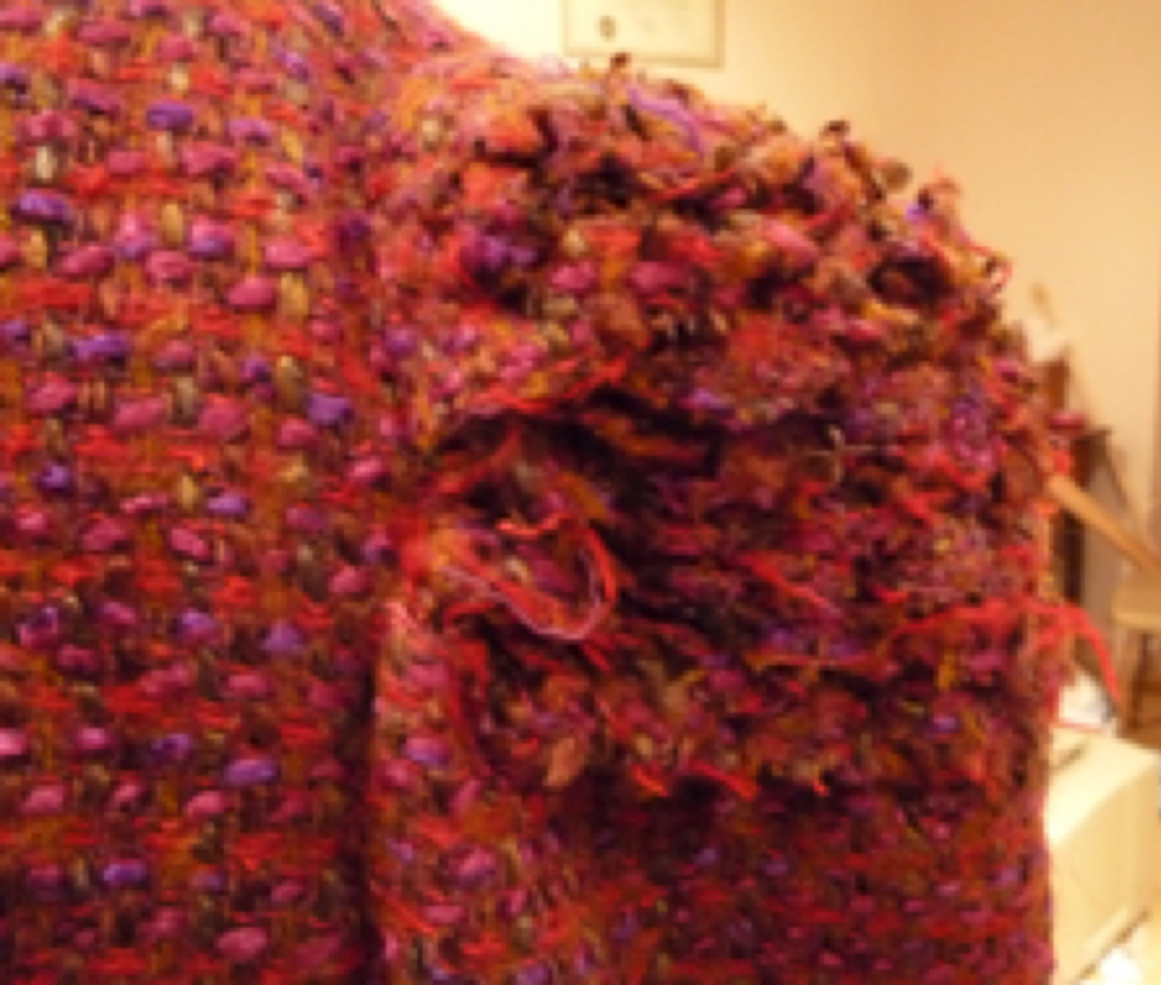
Detail of sleeve cap
For this project, I was intent on showing the folks at Project Runway that someone with a fiber artist’s leanings could indeed bring some of that to the show with success. I did this because, in my previous attempt at becoming a cast member, Tim Gunn felt that my work was too labor intensive to be effective on the show. Austin Scarlett was in my corner, but alas, it was not to be for me for season two, or 3, 5, 6, 7, 8, 9, 10. (I’m only exaggerating a little.) For a kick, you can check out the work I brought for season two and the critique for it, in my appearance on the Project Runway Season One DVD, disk 2, in Austin Scarlett’s “Where are they now” segment. Thank you Austin!

So, with all this in mind for my season three casting bid, I made a great little suit, and added the knit details at the cap of the sleeve and at the jacket and skirt hem. For the jacket, I finished the edges of the body completely—even the armsceye, like it was a vest. Likewise, I finished the sleeves that I had made up without a sleeve cap. It was nothing more than a bag lining, but it was enough. Then I set buttonholes perpendicular to the finished edge, around the top of the sleeve where the cap would be, and at the jacket hem, as far apart as my knitted test sample informed me.
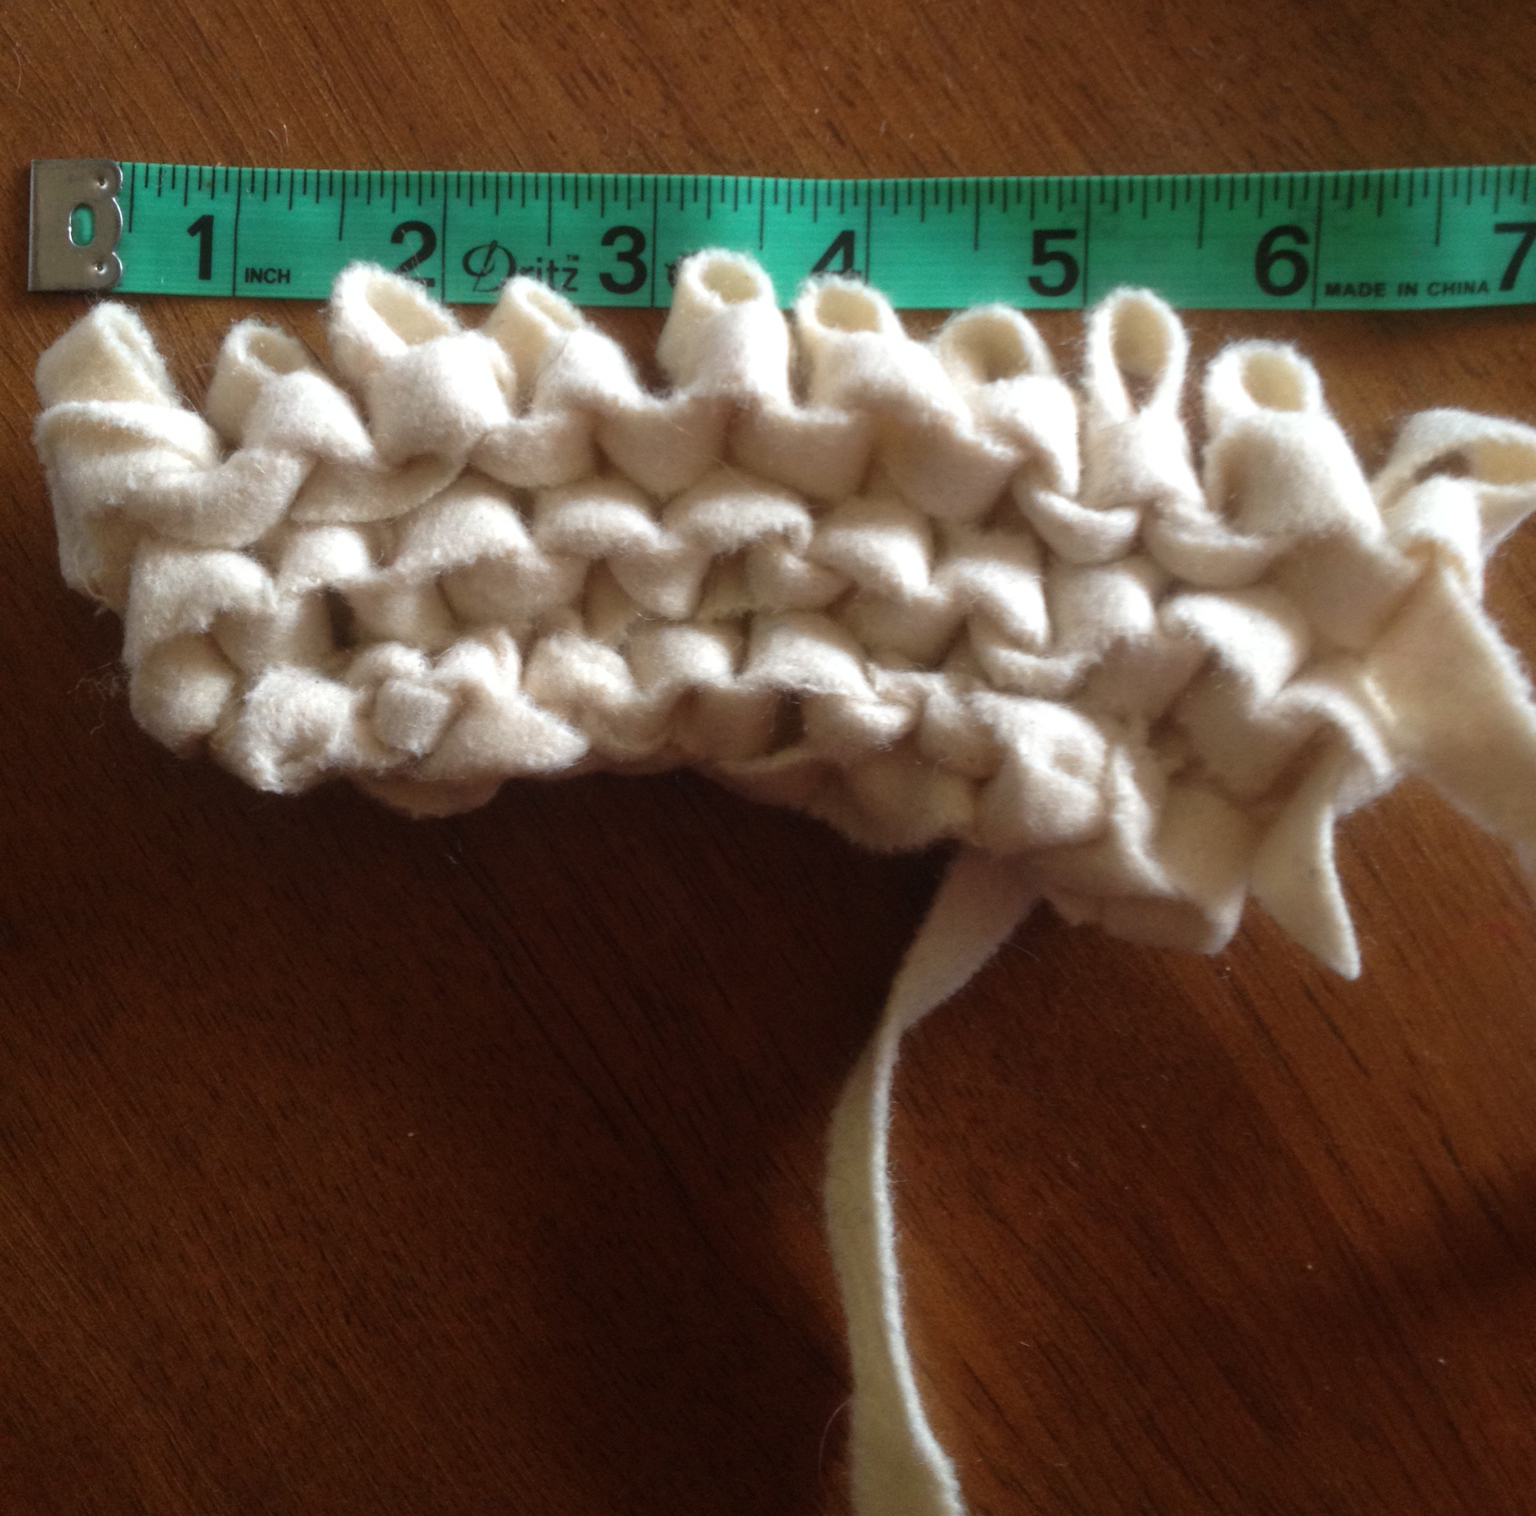
It is important to make a knit sample to test for needle size and the drape of the resulting knit. When you get to a weight and density you like, measure the distance from stitch to stitch. Then make buttonholes that far apart, or as close as possible to that distance while still being equally spaced around the sleeve top and jacket hem. Then pull the fabric yarn through these buttonholes with a crochet hook, onto the needles, and knit as usual. I knit the top of my sleeve cap on circular needles, as I did with the cuffs on the sleeves on the white jacket below. I used my sloper sleeve pattern as a guide for the shape, but you can use any commercial pattern as your guide. Since it’s a really woogy knit, you can get away with a lot here. I have a limited knowledge of crochet, but I bet that would work in this project as well.
I did the same to the finished hem of my jacket and skirt. For this detail, I increased my stitches equally around the hem as I knit, to give the hem a flared, or in the case of the skirt hem, a trumpet shape. I loved it. It did not, however, get me on season 3 of Project Runway. I have been told by an artist friend of mine that I was not “weird” enough to make it to the show, which struck me as odd as I was labelled “too costumey” when I presented this jacket.
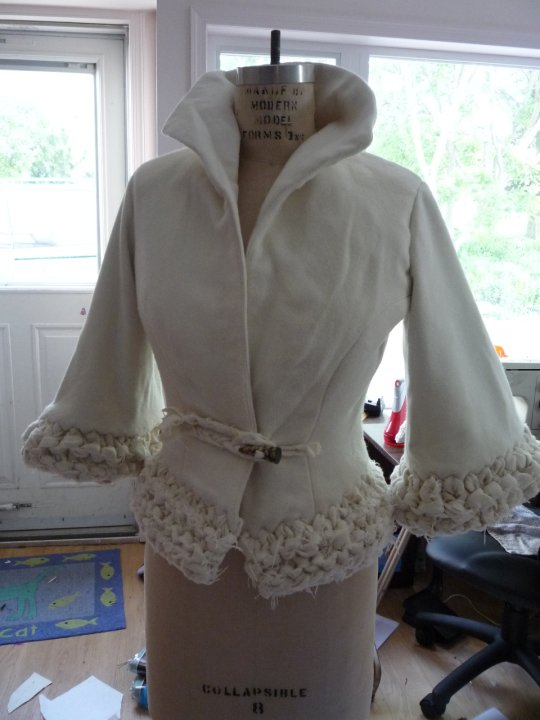
My “too costumey” jacket
Laura Bennett is the one that pronounced my jacket “too costumey”. It’s fresh out of the suitcase here, and wrinkled, but even so, you can still see that her label is completely wrong. And now, a few years out from that declaration, with an exuberant “costumey” clothing style growing, flourishing, and fueled by cosplayers and places like Hot Topic, I will lob a little dismissive snort off to Ms. Bennett. “Costumey” is not a dirty word. “Costumey” is a valid fashion style that is centered on expressiveness and joy.
I am dying to do this with fake fur or fur strips/yarn on a denim jacket. Because of the firm hand of denim, you can just cut off pieces you want to replace, and zig zag the raw edges before you put in your buttonholes. Yes, you can just cut cuffs and a hem and add them, but they will not have the texture and stretch of a knitted cuffs and hem, plus you can mix and match small pieces of fur that would ordinarily go to waste. Knitted, they will blend like a calico cat. Stitch the short pieces together at the ends before knitting. Add a big knitted shawl collar with the same method for a really dramatic and comfy personalization. With these knit additions, you do not need wonderful pattern-making skills because the knit will stretch, and the voluminous texture will cover a lot of mistakes. It’s a great, and green, way to make one-of-a-kind, personalized clothing. It borders on wearable art, and can be a launching point for more additions, like beading, or painting.
There was another time when fashion became an art form: the 60’s and 70’s. We hand-embroidered our jeans. We wore vests we crocheted and macrameed ourselves, and so much more. We lived in thrift shops. This technique is very at-home in this world. Go ahead and wear something expressive now. Go grab a jeans jacket, and tear up some madras to add on as trim. Make it yours, and yours alone.