I am an old school costumer. I don’t identify as a cosplayer. I have 40 years of costumes behind me, all of which I am very proud. I have no wish to distance myself from that body of work, or that costuming community as it was, by changing what I call myself. I still love old school techniques. I find them hard to part with, as much as I love the early science fiction convention costume era.
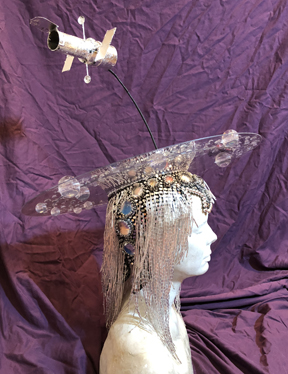
Here you will find an old-school costumer’s, most recent old-school headpiece build. It was inspired by 1I/2017 U1, the first known interstellar object to pass through our Solar System. Mid build, it was renamed ‘Oumuamua, a Hawaiian word meaning “a messenger from afar arriving first”. I loved it even more.
Today most costumers are using Wonderflex to build hats and headpieces. It’s fantastic stuff. Museums are using it to make supports and dress forms for their costume collections and for museum displays. They use it because it is stable and does not outgas, unlike the cosplayers’ darling, Worbla. Worbla is simply the same old-school 1990’s Friendly Plastic pellets smashed flat with an added filler. In my world, Friendly Plastic degrades too quickly for it to be used for anything but disposable items. I had pieces simply crumble at the touch, decades ago before I knew better, and wept over it. The longevity thing might just be me, though.
Wonderflex rules now, but back in the day, it was wool felt, straw, and buckram that made up a holy trinity for milliners. Buckram, because of its strength and rigidity, was the starting point for headpieces. It looks a lot like needlepoint canvas, but stiffer, because of the glue. It is NOT the same stuff they sell for curtain headers under the same name. In the case of shaped pieces, such as crowns, it is first wetted and then pulled and shaped over a form with the aid of pushpins and elastic. When it’s dry, it is removed and the edges are trimmed.
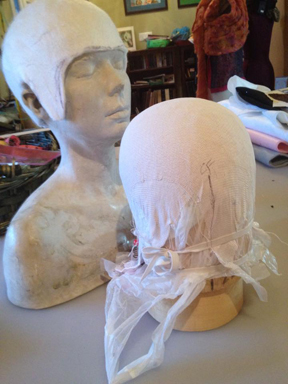
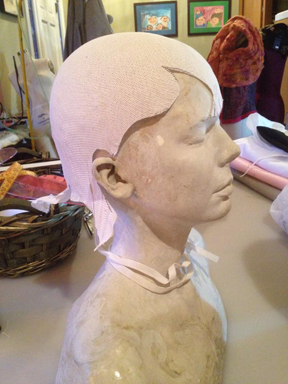
On the stone life cast in back (me, circa 1990) you see a rough Wonderflex skull cap. In front, on the wooden block, is a buckram base already pulled and dried on the form.
My hat block is balsa, and is a standard size and shape. It is about 1/2″ to 1″ larger than my head size to allow for a lining and some ease. You can find hat blocks here, and here, among other places. You can carve your own like these. If you find you fall in love with millinery work (and who doesn’t?), check out this page.
I start by covering my block with aluminum foil, or these newfangled plastic grocery bags that we didn’t have back in the day. A piece of buckram, cut to size, is wetted in a cake pan filled about half way with water, and we are off to the fun part.
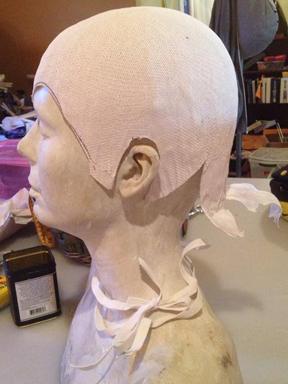
The straight of the grain goes at center front and center back, pinned in place with push pins. Same goes for the sides. Grab the opposite bias corners and pull down. Repeat as needed until there are no wrinkles. There is nothing like the feeling of that first crack of the glue, and the curve of the block taking shape in the buckram. Everything is possible. Smoothed and left to dry, I sketch out the edge shape. I am lucky to have a life cast to work on. Before I had this, I simply used my actual head. It’s easier to see the design as a whole if you have something with which you can easily see all sides from a few steps back—with a face on it to boot.

Curves penciled in, center front marked, so as not to lose track of it.
Ears cut out. I decided to leave the bits in the back that were below where I had my elastic set, just because I thought they looked cool.
I just love asymmetry. Another odd bit below the ear that I decided to keep.

Final front edge shape.
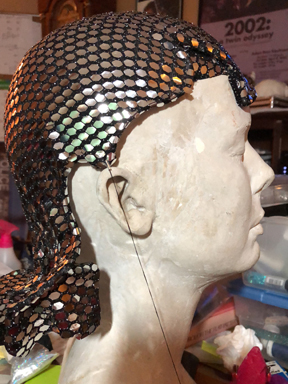
My least favorite part is wiring the edges, but it’s necessary to make the buckram stable and firm. Covering the wire with bias is a little more satisfying because I’m almost ready to get to the good stuff.

Wire edges and then cover the wire with bias tape.
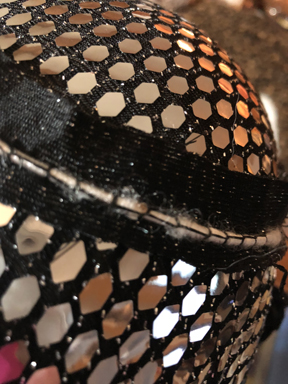
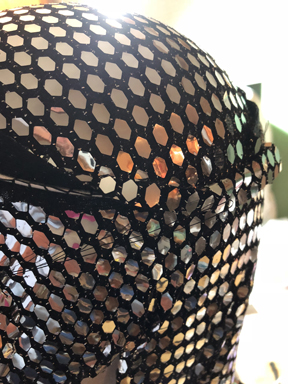
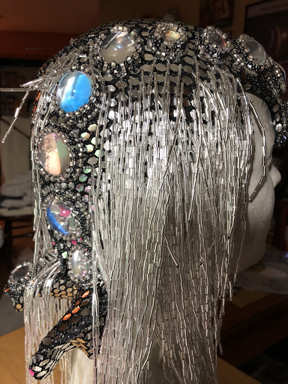
Covering the form is next. Knits are best. Knits without glued-on sequins are better, so one does not have to flight them. Nevertheless, I plod on with my sequined choice, pulling over the crown, and pinning it in place until it fits smoothy—or as close as it possible. Future numerous stabs with beads will hammer out the last bumps. Stitch fabric in place. I swear I was going blind from the reflection.
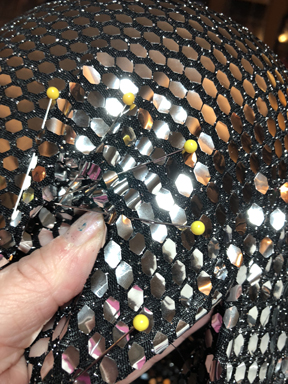
Stretch and pull fabric over the form. Smooth and pin in place.
Stitch fabric down, all around the edge. Keep it neat!
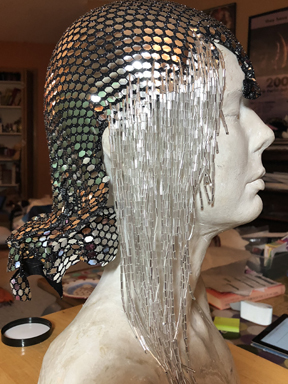
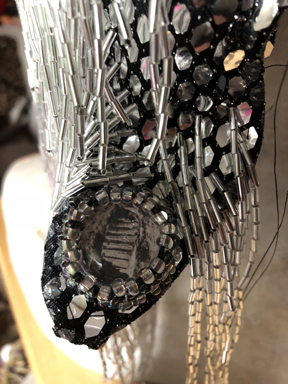
Hours and hours of beading later, it starts to take shape. I was not really sure where I was going with this at the time, but I knew I wanted at least this going on. I was playing with the idea of polycarbonate disks with “stars” and planetary objects, so I knew I’d have to stop very soon if that was going to happen.
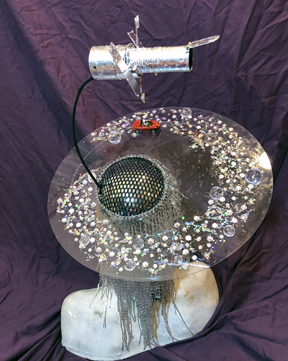
Not much later than this point, I decided it indeed was going to happen. In order to be sure that the disk did not distort the frame, or weaken it, another wire is secured at the crown where the disk will sit, and it is covered.
A strip of the same fabric is cut, and placed behind the wire before it is stitched to the frame.
The wire gets covered.
After the decision of the disk is well and truly made with the addition of the support wire, I needed to make it feel at home. I added acrylic hemispheres along one side, securing each one as one would a cabochon.
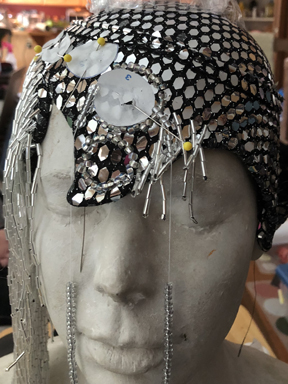
Paper circles, sized to the acrylic hemispheres pinned in place for placement.
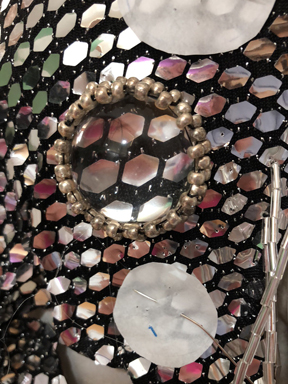
I liked the magnifying effects but in the end I went with photos of planets under each hemisphere. It provided a nice pop of color. I also ended up changing the securing beads.
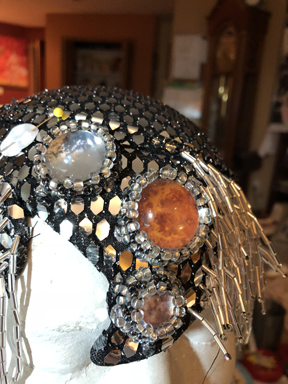
Mercury, Venus, Earth. I opted not to have them to scale, but to have them in a more pleasing size gradient that fit better with the design.

Hello Earth, Mars and Jupiter!
All nine in place (plus). Yes, NINE. Old school!
Had to get all of the bugles on before the disk, as it would be very very hard to bead with the disks on.
Here is the the Pan-STARRS telescope at Haleakala Observatory, Hawaii. The telescope that found ʻOumuamua.
One small step!
Then, in the middle of the build, there came Starman. SpaceX’s Starman. Whimsy, and science, and nods to science fiction, and music, and art, and the future, and adventure. I had to add Starman. I paid too much for this matchbox, as it was too soon after the launch, but I did secure my Roadster, and I sculpted my Starman out of pearl white Sculpy.
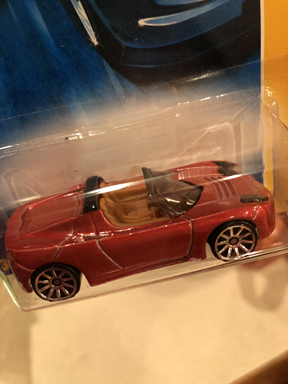
Hello Matchbox Tesla roadster. Let’s make more art.

Sculpted but not yet baked. So tiny. It was hard to get any detail. It was also nerve-wracking getting Tiny Starman out and baked. I feared he would not keep his shape well enough and the details I did manage to sculpt would just wilt away, or he’d just not fit anymore. Truth told, I did have to trim his single leg.
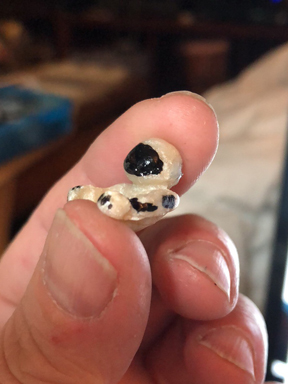
Tiny Starman baked and painted.
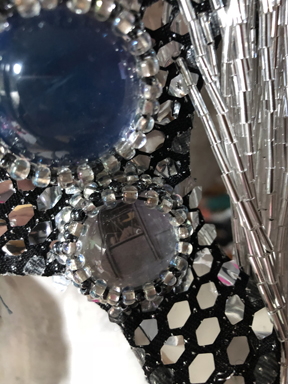
I opted for two 1/16″ inch polycarbonate disks glued together with 2-part epoxy, to cut down on weight. You can see the edge of the smaller one here. Never having worked with polycarbonate, and never using glue to put on any trim (never!), I lost my way on the application of the stones, and these fogged. I popped them off before it was too late and replaced them with new while switching glue to E6000.
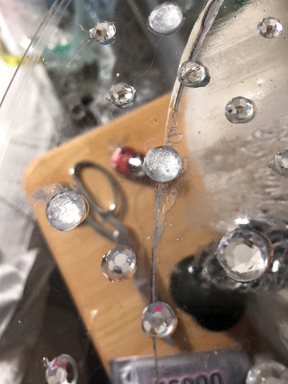
Foggy stones from acrylic solvent cement. Oops!

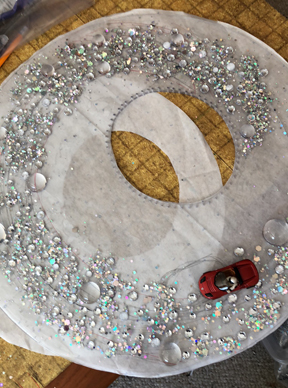
Adding stones.
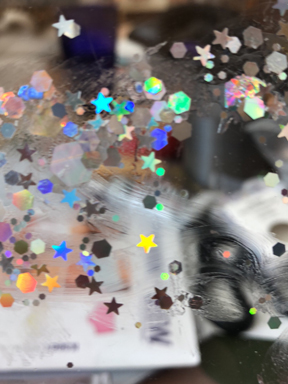
I was peeved about the glue that was holding the layers showing, so I added hologram glitter.

Test fit.
Adding more rhinestones and acrylic hemispheres, leaving a parking space for Tiny Starman
Later, our once-troubled Hubble sent back some amazing pictures of ‘Oumuamua, so I had to add that as well. On short notice, the amazing BJ Johnson created and 3D-printed a Hubble file from NASA specs which I then silver leafed. Another wire ring was added on top of the polycarbonate support ring to provide a home for his amazing model. The upright was covered in heat shrink tubing.
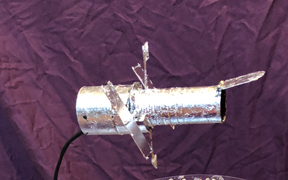
Amazing Hubble print by BJ Johnson https://www.facebook.com/PenskeGuy
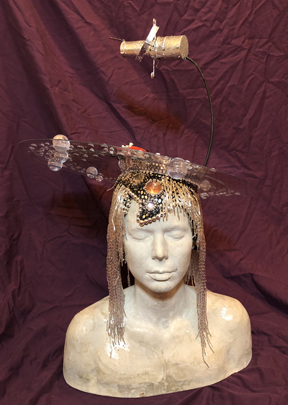
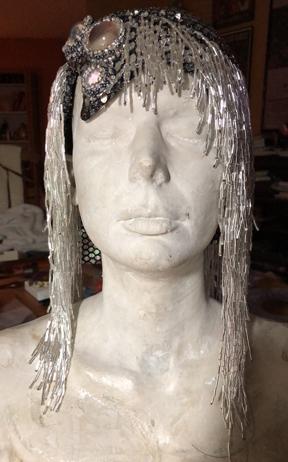
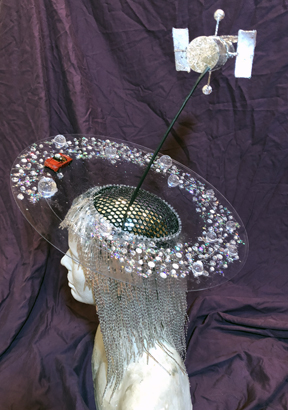
And here she is, the ‘Oumuamua Starman headpiece. I just love her, and I don’t really want to be finished with her yet. I have not yet pulled a felt lining, so I am still open to add.
Coming from one “old-schooler” to another, you have always done and continue to do beautiful work – just for the SAKE of doing it. No prizes needed. My hope is that one fateful day, we get to join forces again on a stage somewhere in this galaxy.
Absolutely inspired work! I am no hat designer, but I love wearing such designs at this! I would be tempted to create a LARP character entirely around this hat. Lot’s of work went into this, and it definitely shows!